
Guía para conectar la centralita Wildix (PBX en la nube) con Clientify (CRM), paso a paso.
Esta wiki documenta el flujo completo de la integración: acceder a la PBX de Wildix, generar la API de empresa, extraer la API de Clientify, configurar la integración y activar el popup de llamadas para cada usuario.
Step-by-step guide to connect Wildix (cloud phone system) with Clientify (CRM).
This wiki covers the full integration flow: access your Wildix PBX, generate the company API key, get the Clientify API key, configure the integration and enable the call popup for every user.
Se accede a la centralita desde la URL propia de la empresa:
https://dominio.wildixin.com
En nuestro caso, dominio es el de vuestra empresa. Introduce las credenciales facilitadas por Wildix.
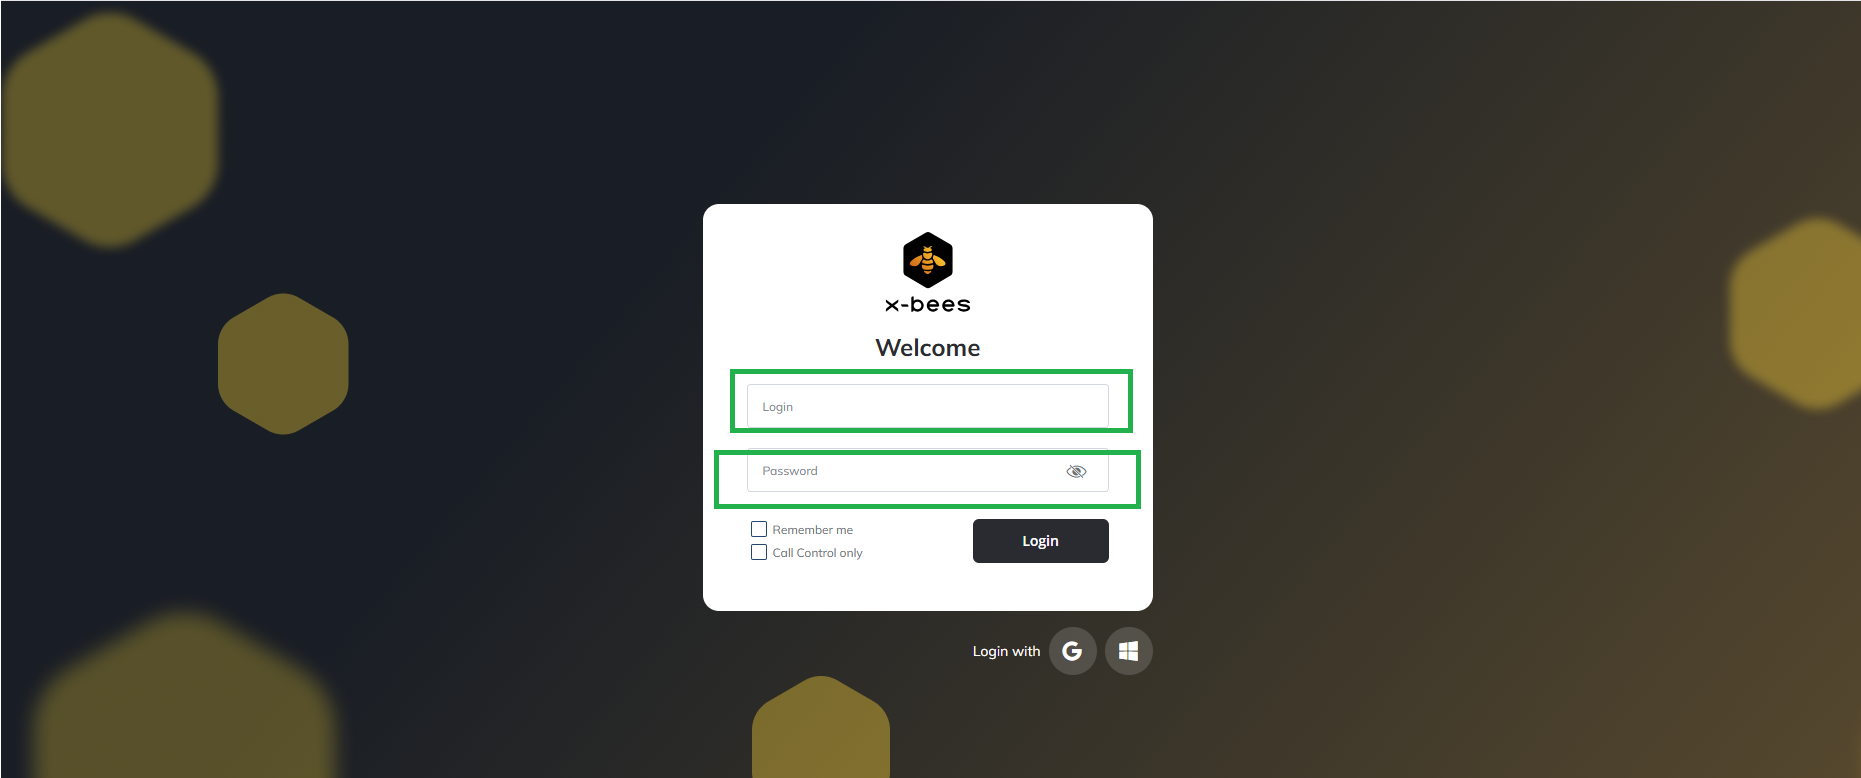
https://empresa.wildixin.com (usuario admin).Access the phone system from your company URL:
https://domain.wildixin.com
In this case, domain is your company's domain. Enter the credentials provided by Wildix.
https://domain.wildixin.com (user admin).Dentro de la centralita Wildix, navega a:
PBX → Integraciones → Clave API de empresa
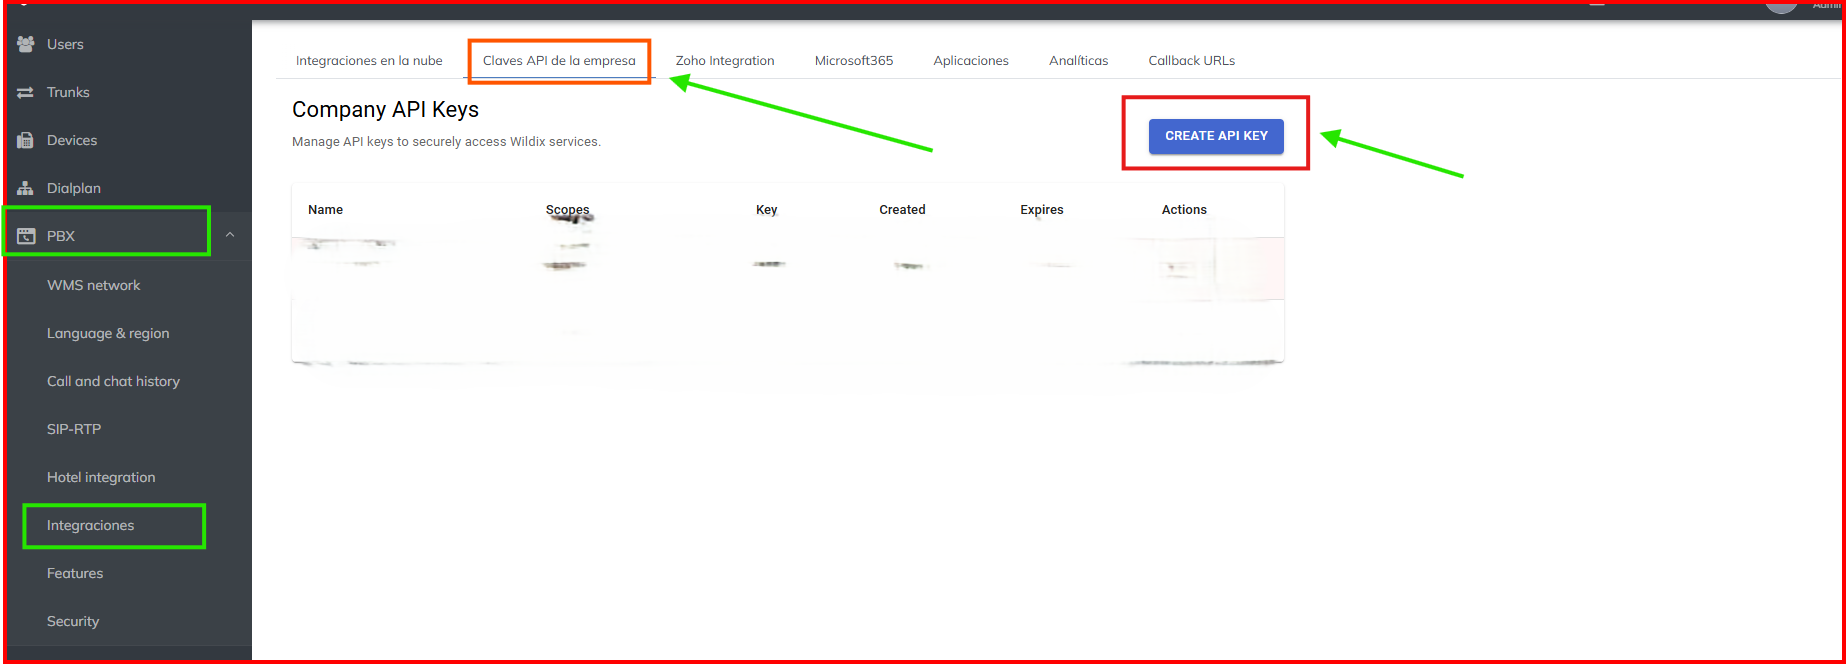
Desde ahí se crea una nueva API empresa.
Inside the Wildix phone system, go to:
PBX → Integrations → Company API key
From there you can create a new company API.
Sigue estos pasos para crear correctamente la API empresa:
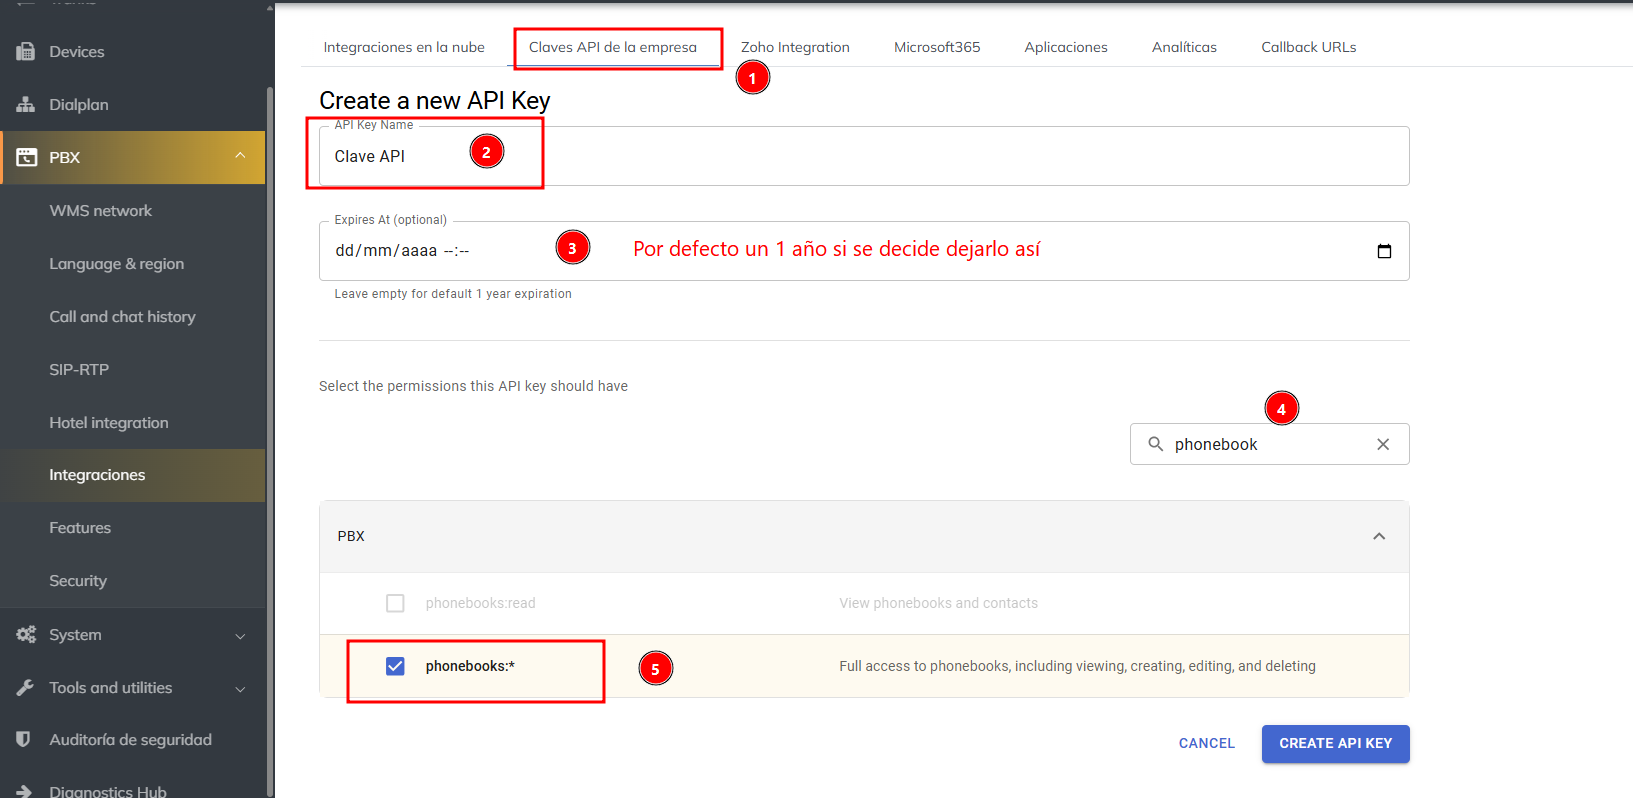
Phonebook y seleccionar (*).
recordings y seleccionar (read).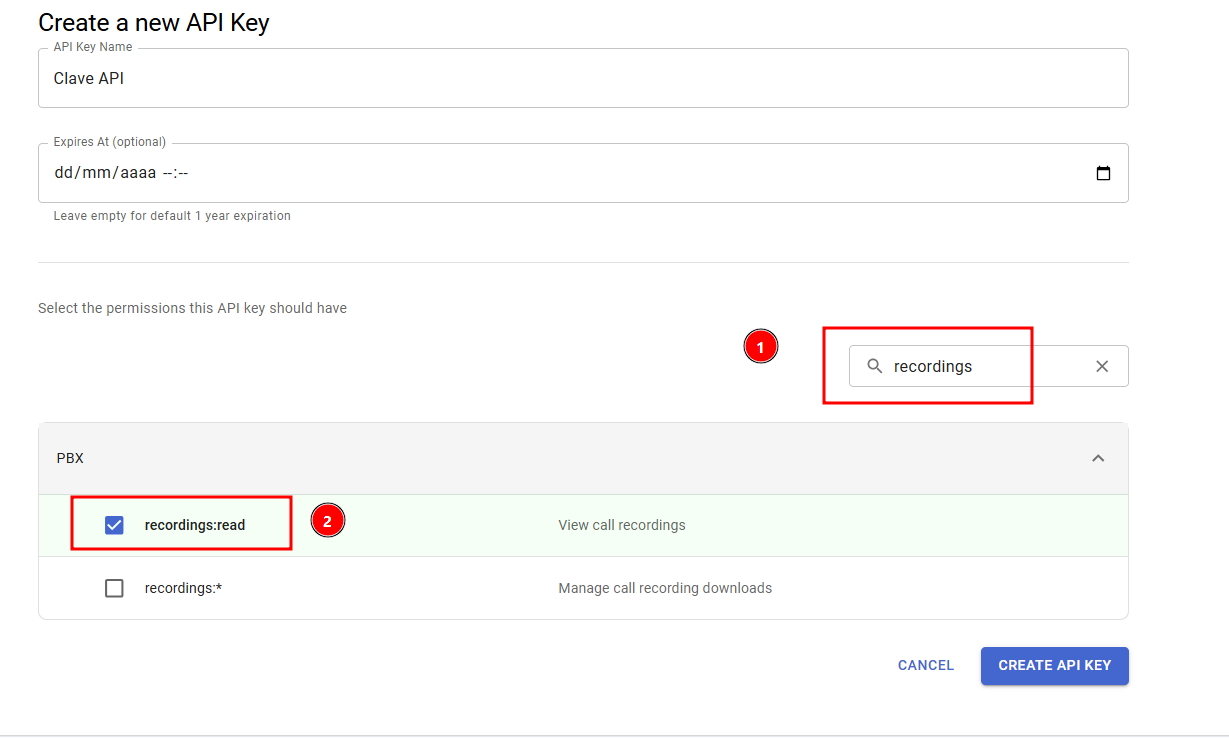
Follow these steps to create the company API correctly:
Phonebook and select (*).
recordings and select (read).
Para finalizar, copia la API empresa que se genera y verifica que los permisos asignados son:
Phonebook (*)Recording (read)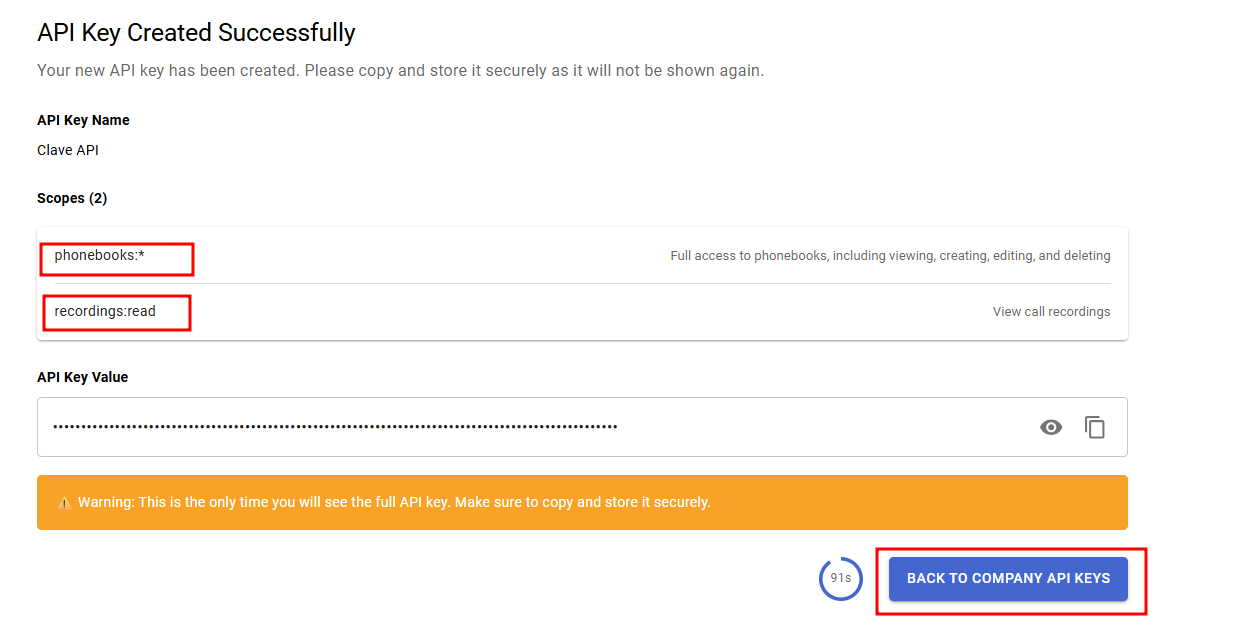
To finish, copy the generated company API and check the assigned permissions:
Phonebook (*)Recording (read)
Para extraer la API de Clientify, accede a tu panel:
Visita Clientify (https://new.clientify.com)
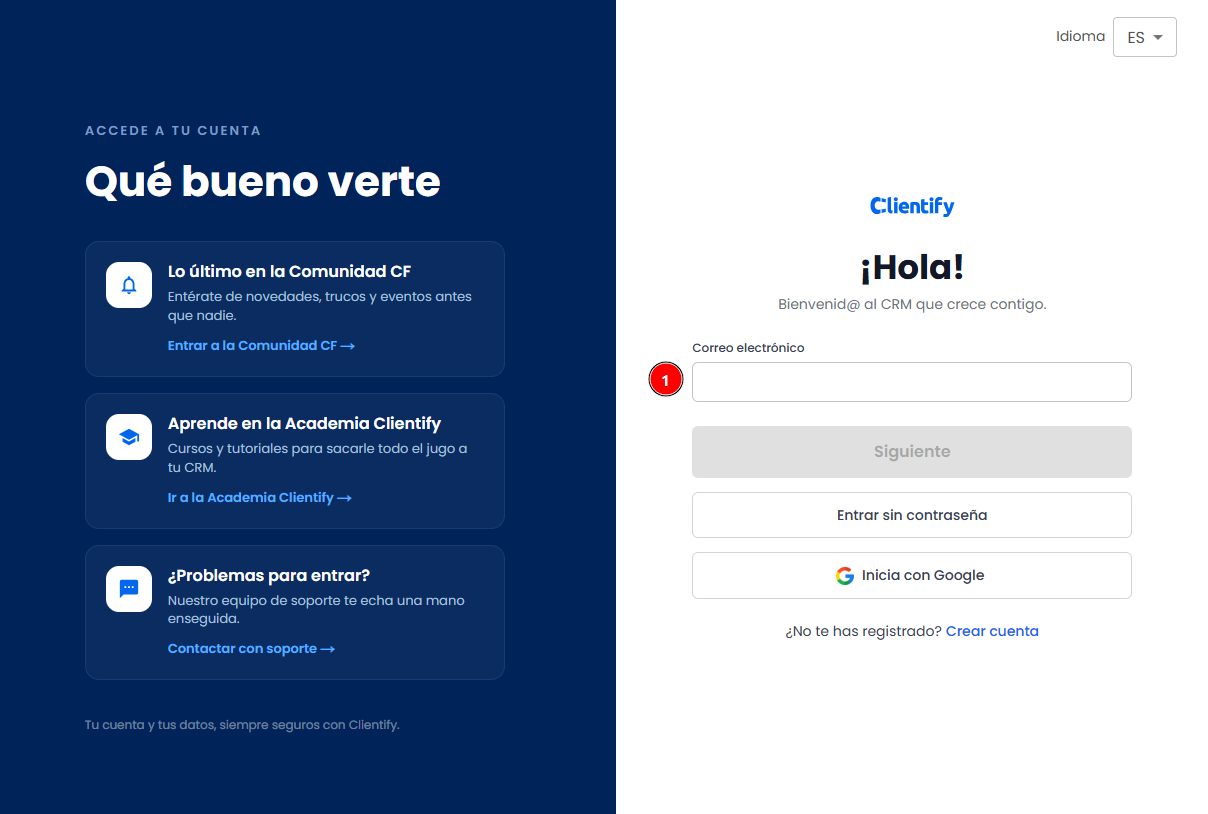
Una vez dentro, pulsa la combinación de teclas CTRL + K o selecciona la lupa situada en el lateral izquierdo.
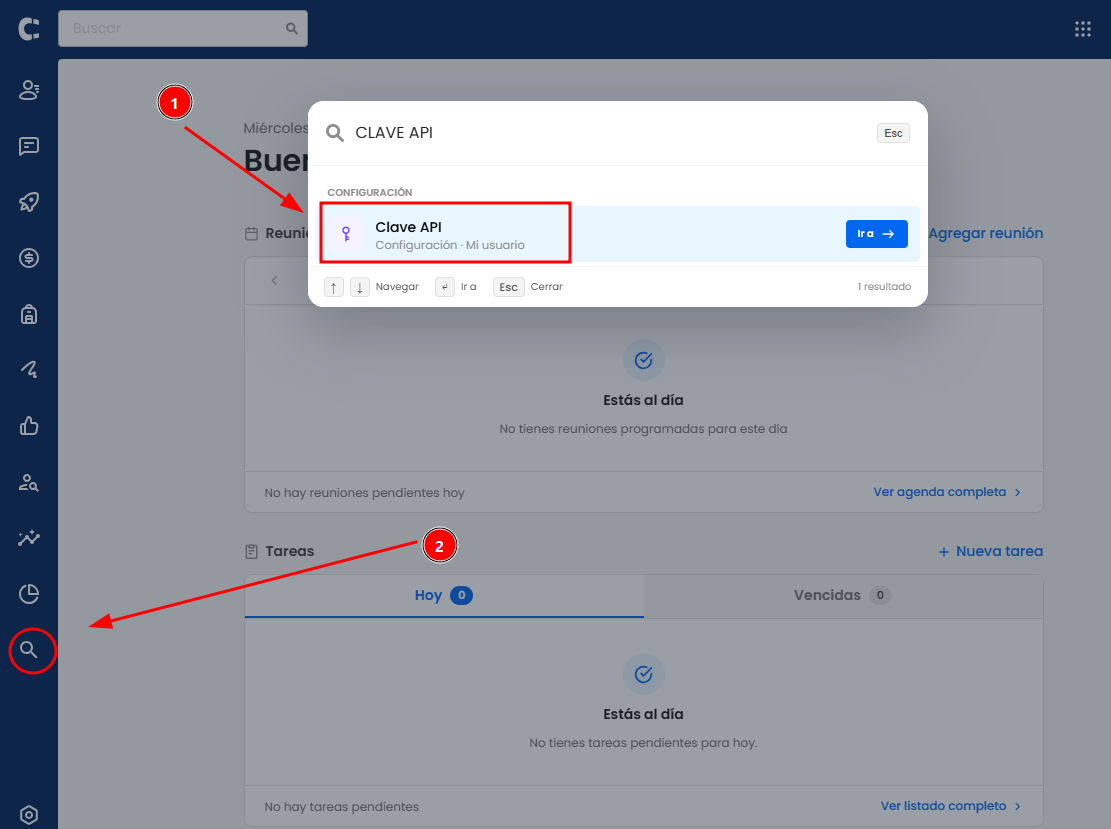
Busca clave API y copia la API de Clientify.
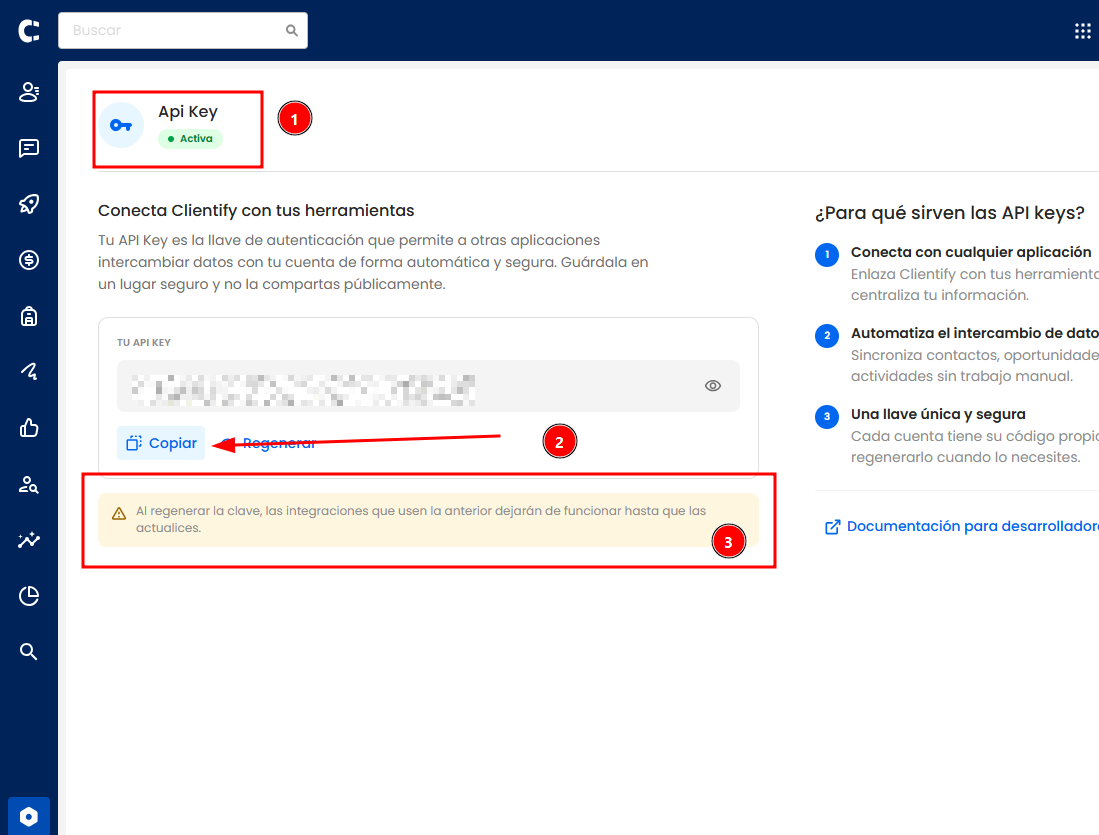
https://app.clientify.com/settings/api-settings/ → sección API.
To get the Clientify API key, sign in to your dashboard:
Visit Clientify (https://new.clientify.com)
Once inside, press CTRL + K or click the magnifier on the left side.
Search for API key and copy the Clientify API key.
https://app.clientify.com/settings/api-settings/ → API section.
Completa el formulario de registro.
Visita el formulario de la integración (https://wildixclientify.tecnologicaccs.com)
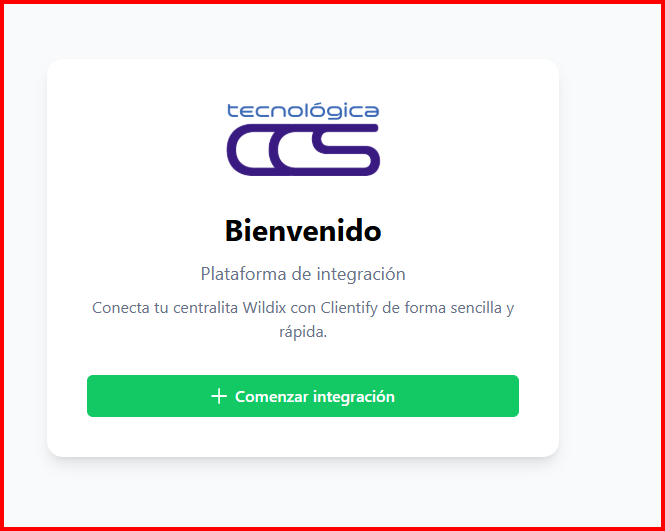
La página muestra el formulario de integración con los apartado Empresa, Wildix, Webhooks y Clientify. Los pasos siguientes (3.1 a 3.5) explican cómo rellenarlo.
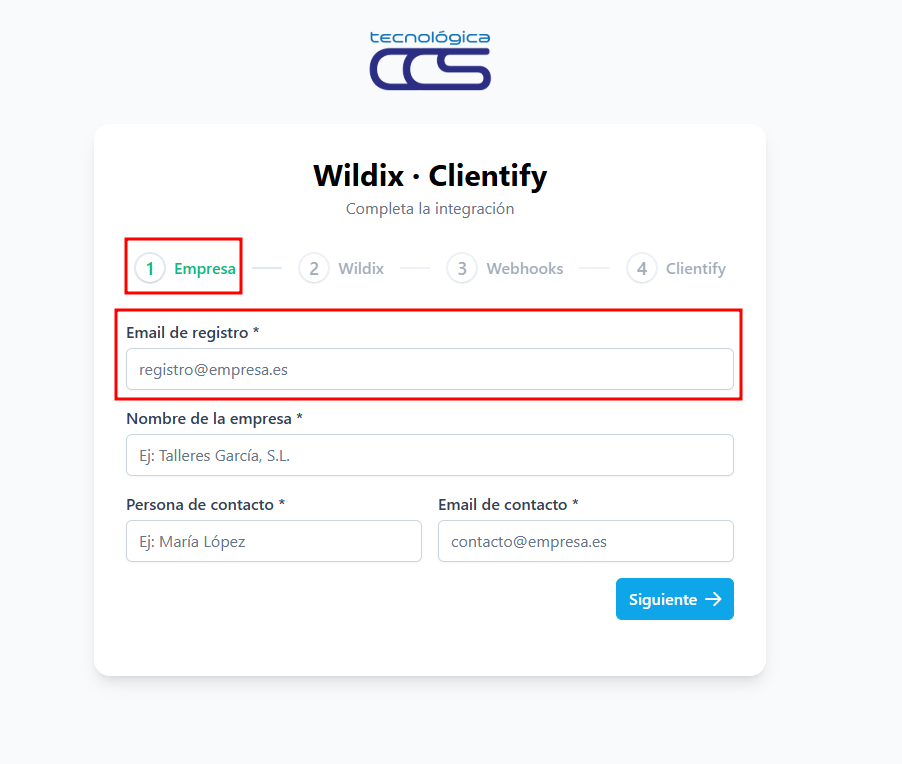
Complete the registration form.
Visit the integration form (https://wildixclientify.tecnologicaccs.com)
The page shows the integration form with the Enterprise, Wildix, Webhooks and Clientify sections. Steps 3.1 to 3.5 below explain how to fill it in.
En el apartado Wildix del formulario, rellena:
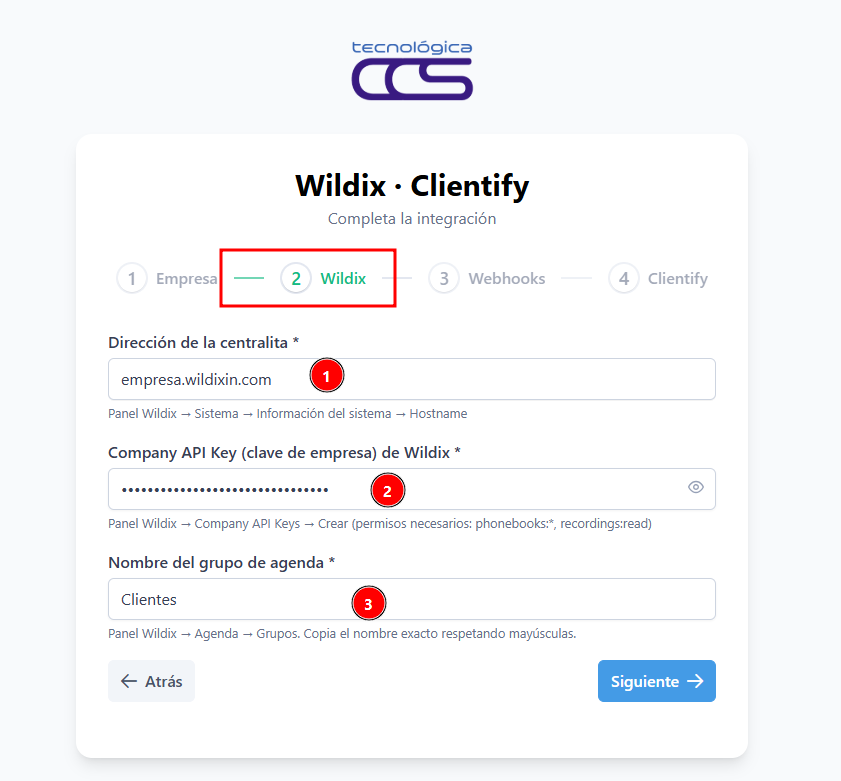
Dentro de la centralita Wildix, navega a:
PBX → USERS → PHONEBOOKS
Copia el nombre de la agenda creada respetando mayúsculas y minúsculas.
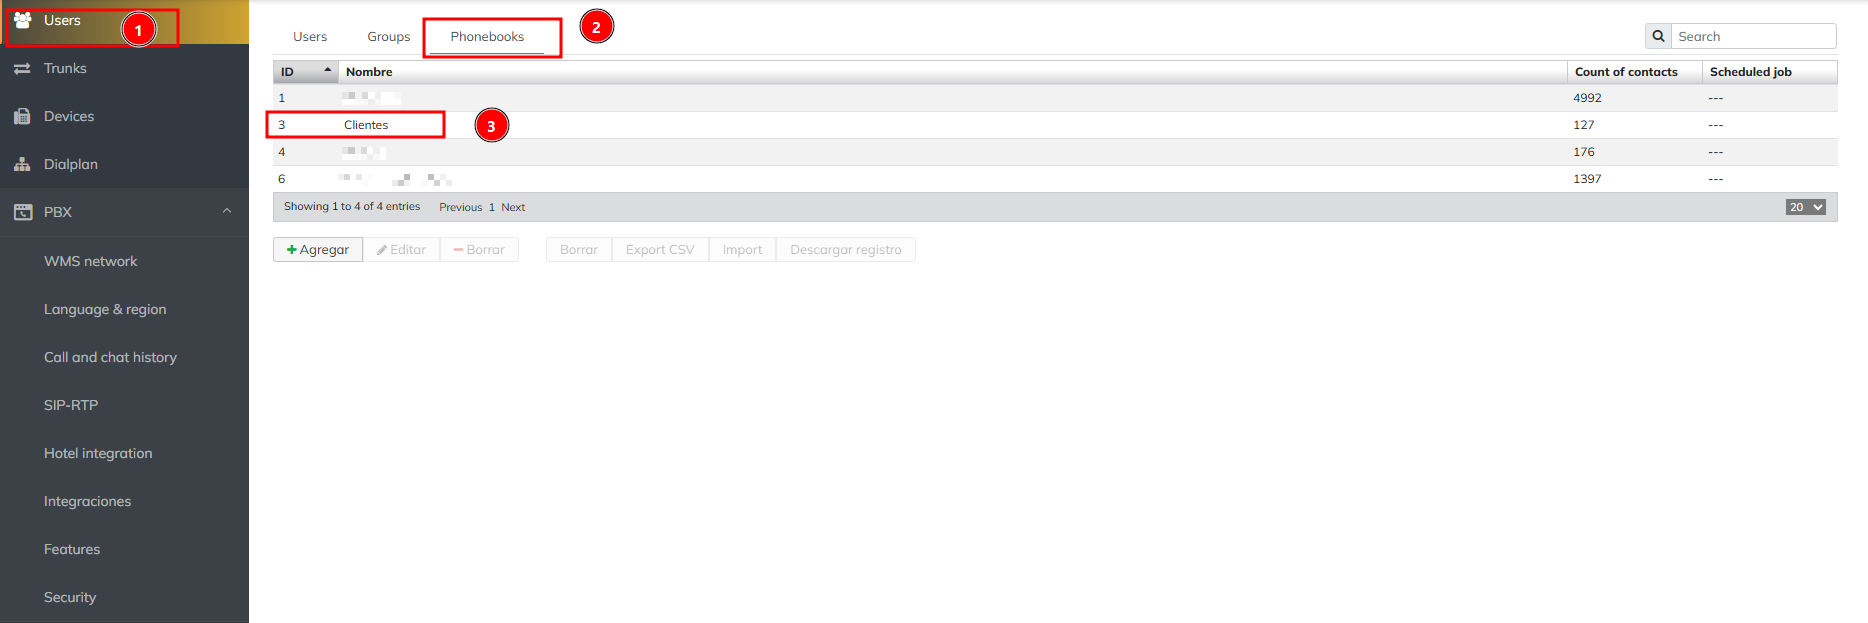
In the Wildix section of the form, fill in:
Inside the Wildix phone system, go to:
PBX → USERS → PHONEBOOKS
Copy the name of the created phonebook respecting upper and lower case.
En el apartado Webhooks Wildix del formulario, pega los dos webhooks que se generan desde la centralita (paso 3.3).
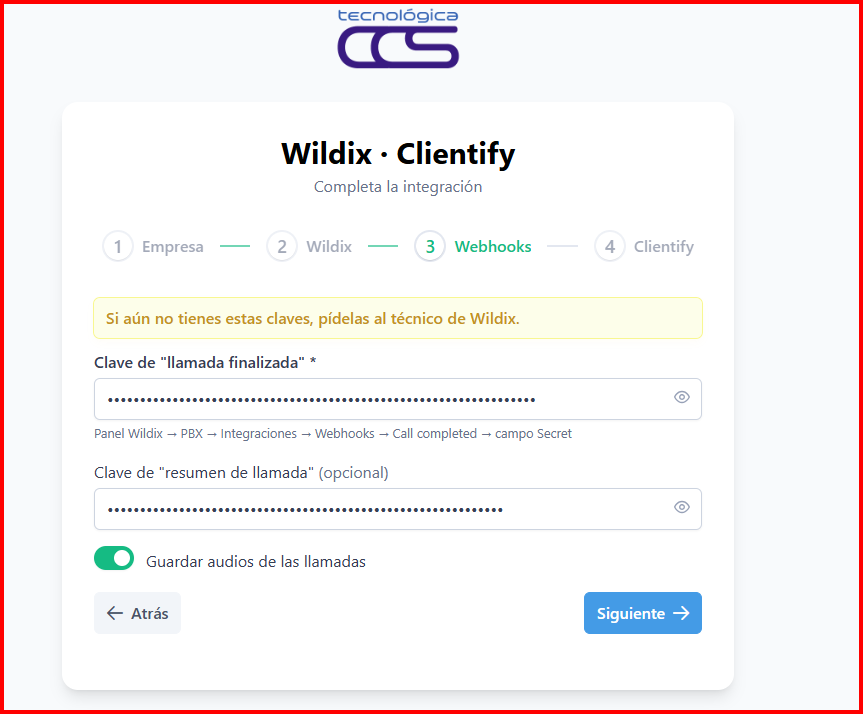
PBX → Integraciones → Webhooks.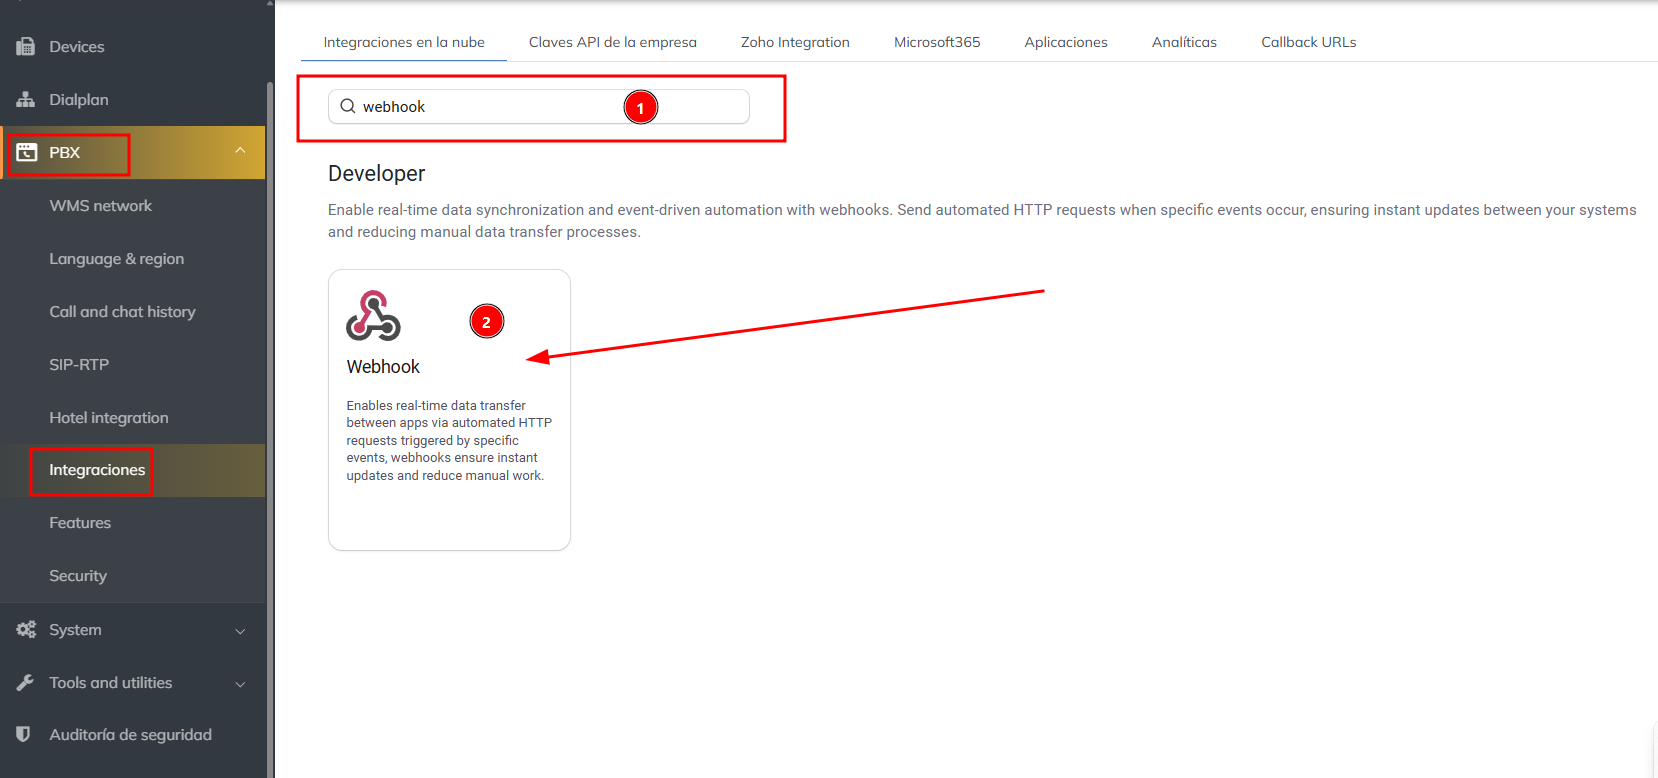
In the Wildix Webhooks section of the form, paste the two webhooks generated from the phone system (step 3.3).
PBX → Integrations → Webhooks.
Para crear los webhooks, accede a la centralita y crea dos: uno para llamadas y otro para resúmenes.
PBX → Integraciones → Webhooks → Agregar nuevo
https://wildixclientify.apiscima.es/api/calls/completedAnalytics events → Callcompletedsecret.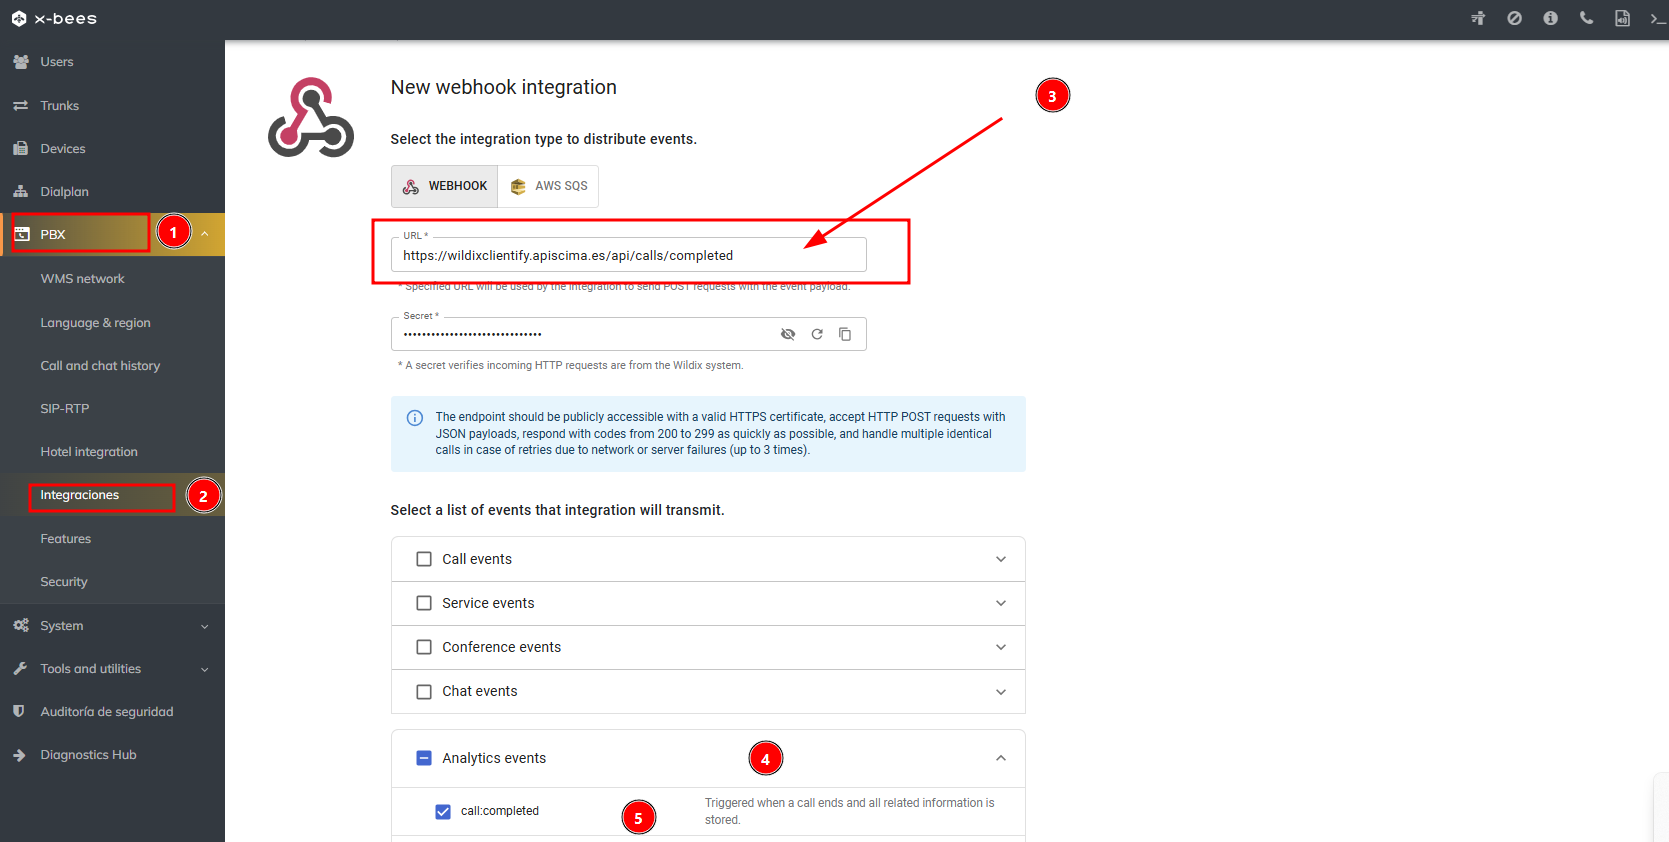
https://wildixclientify.apiscima.es/api/calls/summaryAnalytics events → Callsummarycompletedsecret.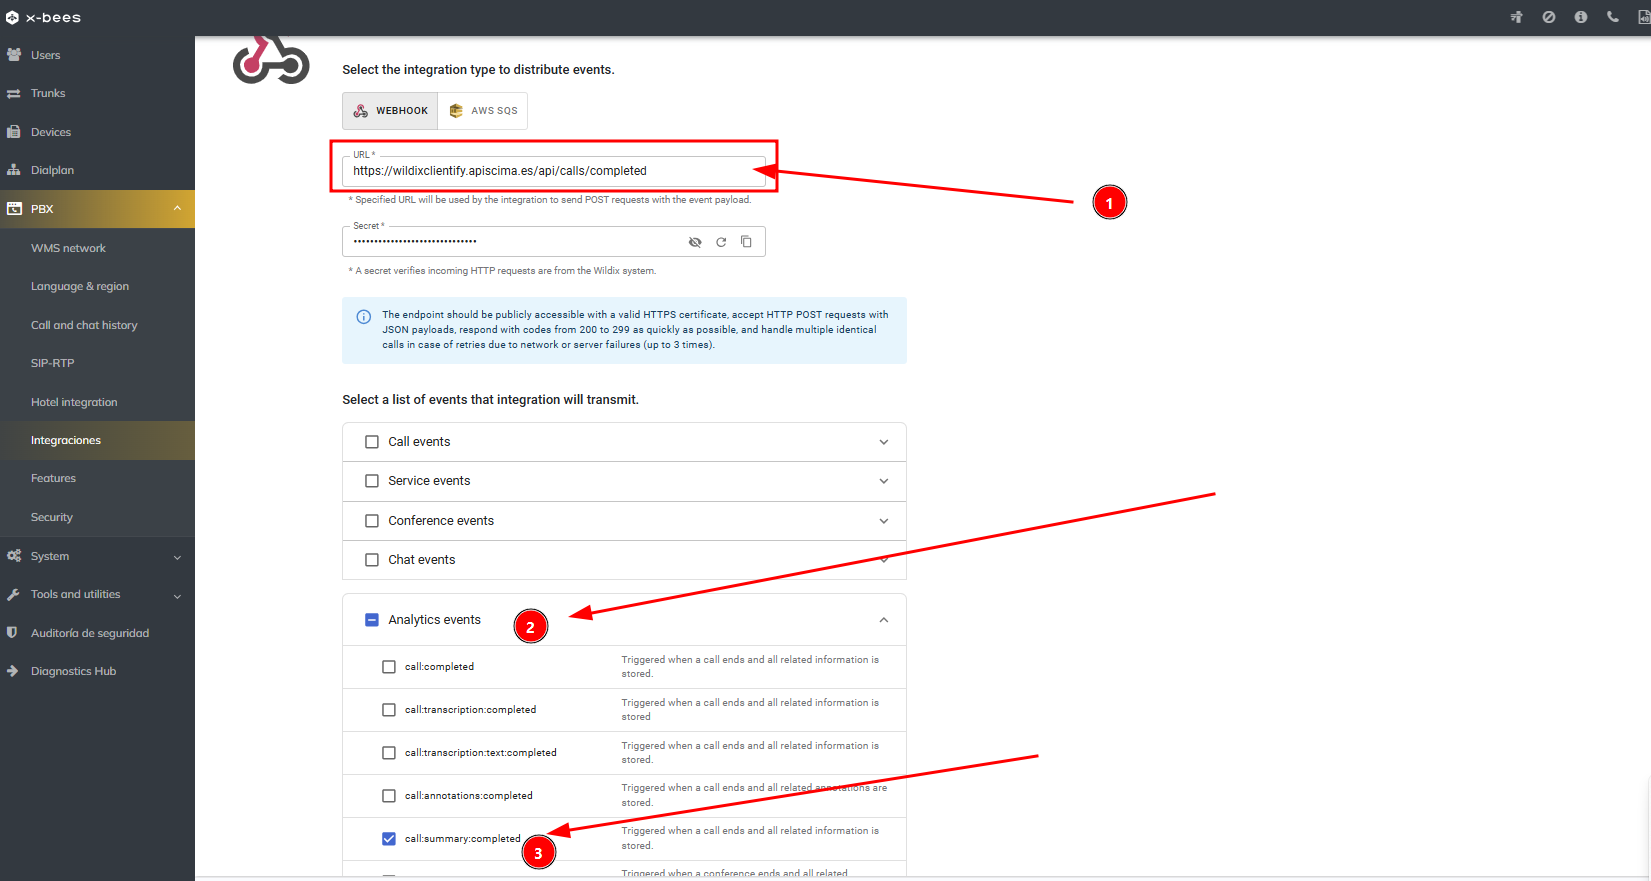
secret: se pegan en el apartado Webhooks Wildix del formulario de integración.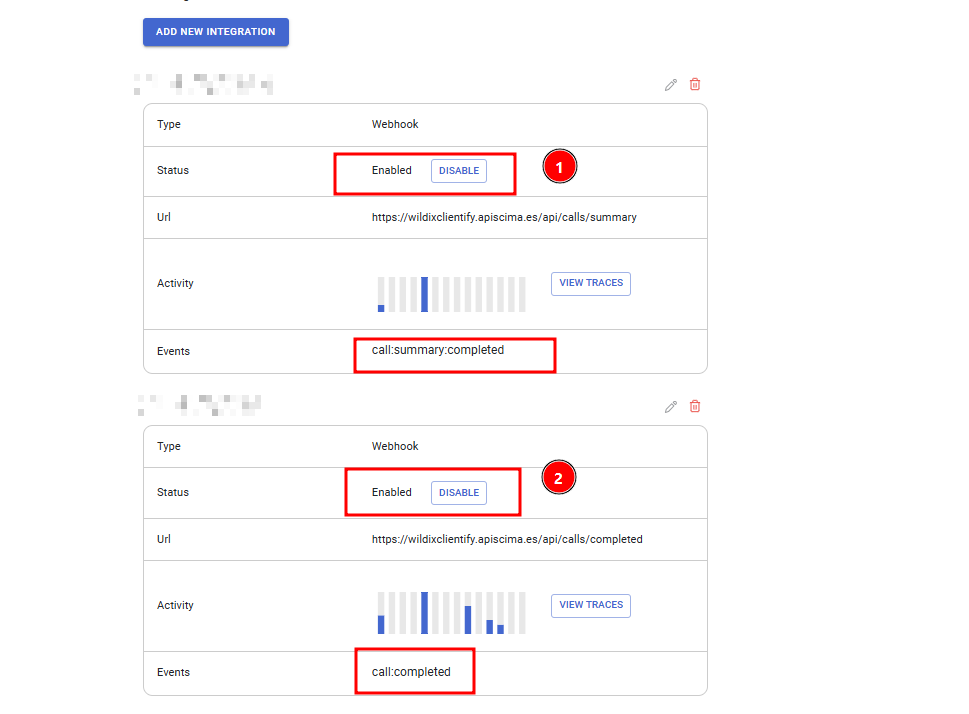
To create the webhooks, open the phone system and create two: one for calls and one for summaries.
PBX → Integrations → Webhooks → Add new
https://wildixclientify.apiscima.es/api/calls/completedAnalytics events → Callcompletedsecret.
https://wildixclientify.apiscima.es/api/calls/summaryAnalytics events → Callsummarycompletedsecret.
secrets: they are pasted into the Wildix Webhooks section of the integration form.
En el apartado API Clientify del formulario, rellena los campos correspondientes con la API de Clientify copiada en el paso 2.
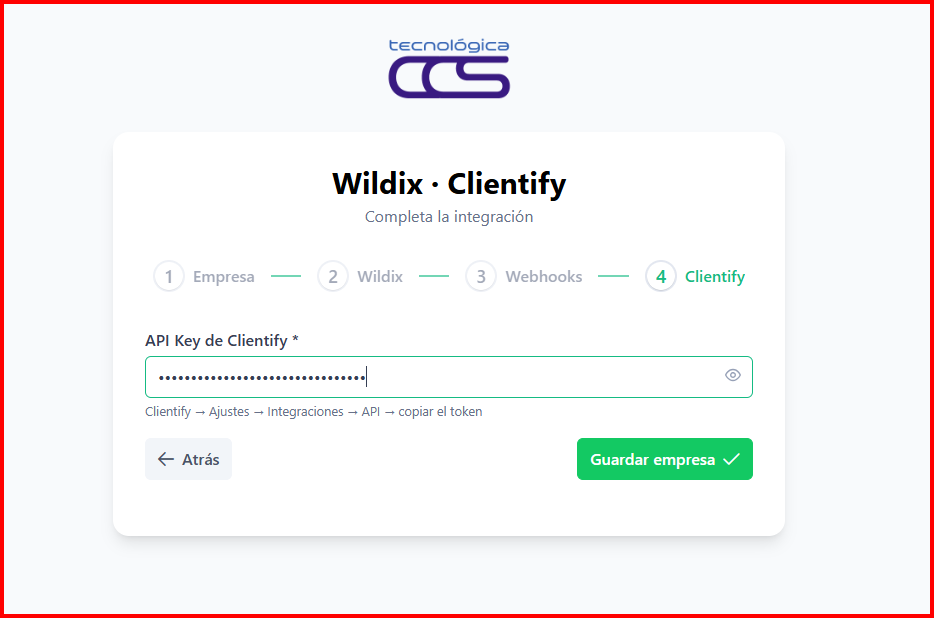
In the Clientify API section of the form, fill in the fields with the Clientify API key copied in step 2.
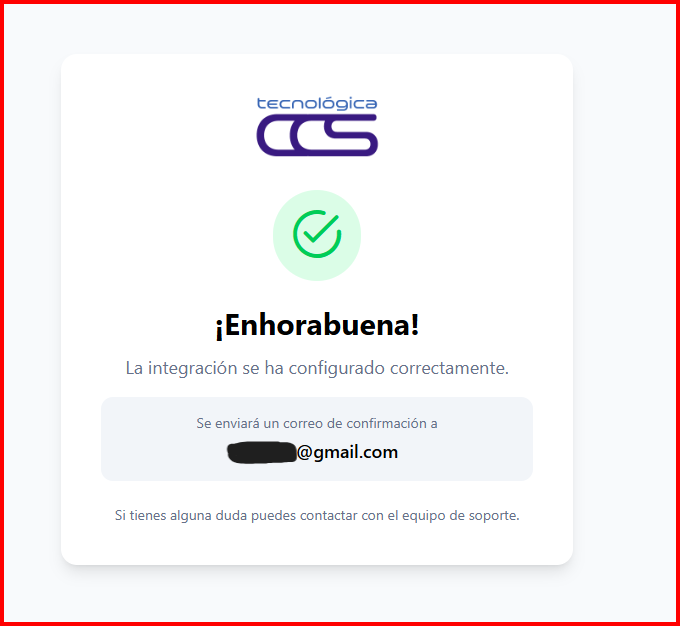
Una vez realizados los pasos de la integración, llegará un correo con una URL que deberemos copiar para configurarla después en cada usuario dentro de Wildix PBX (paso 4).
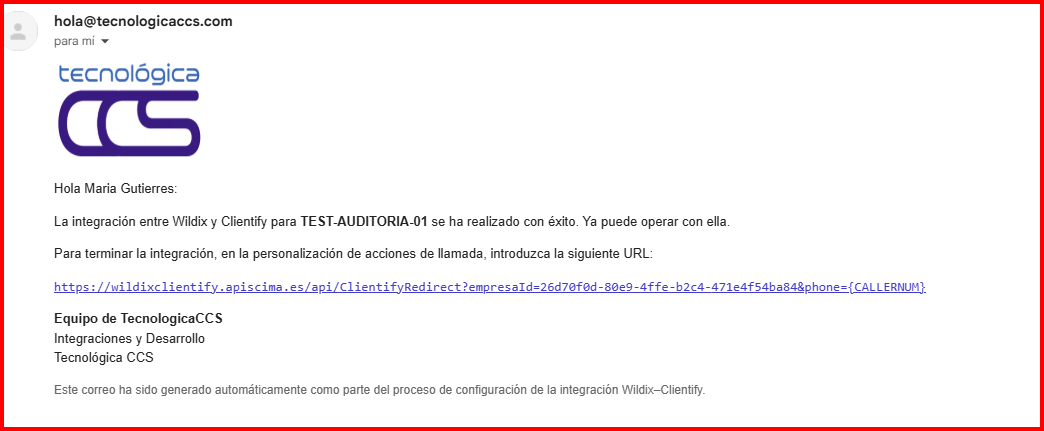
Once the integration steps are done, you will receive an email with a URL that must be copied and configured later for each user inside the Wildix PBX (step 4).
Para activar la apertura automática de la ficha del cliente (popup), configura la URL en cada usuario:
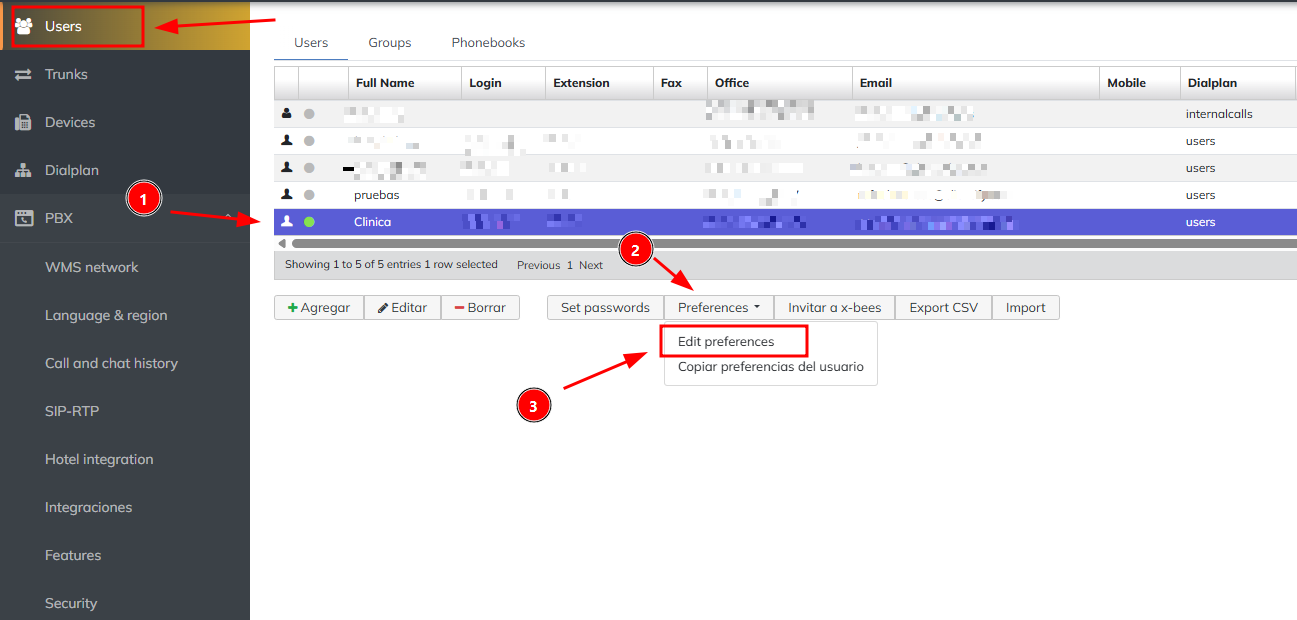
Una vez realizado el paso anterior, aparece la ventana de configuración:
settings.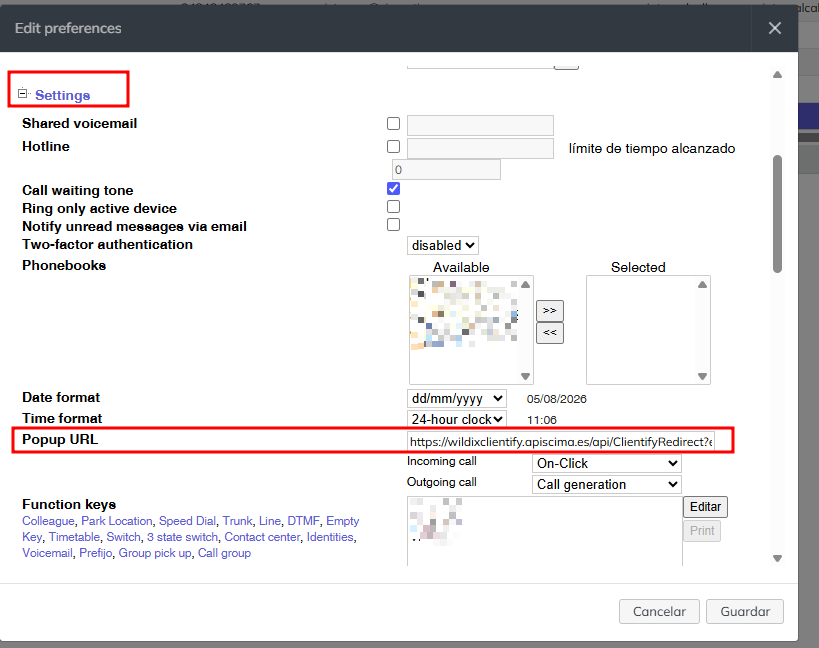
To enable the automatic opening of the customer record (popup), configure the URL for each user:
Once the previous step is done, the settings window appears:
settings.
La Popup URL tiene dos opciones que controlan cuándo se abre la ficha del cliente en Clientify:
The Popup URL has two options that control when the customer record opens in Clientify: